This procedure lets you specify default directories for frequently
performed import/export operations.
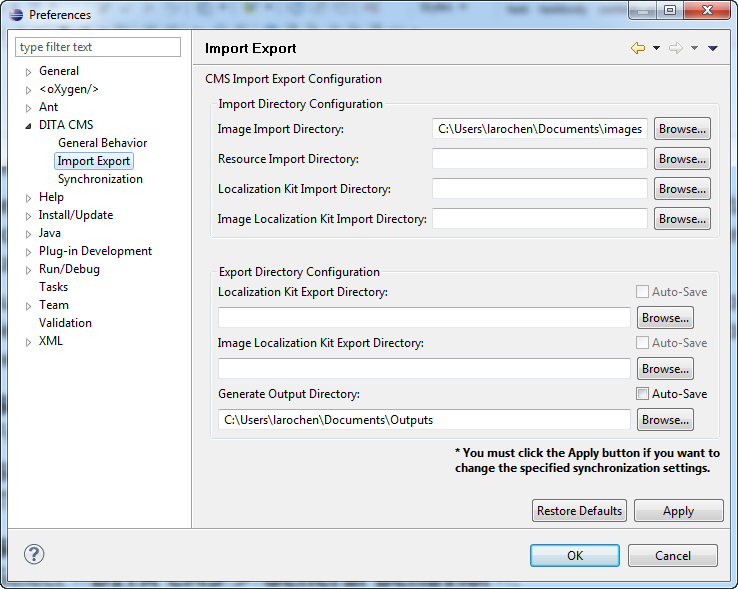
The Import Export options let you configure the
source and target directories for your most frequently performed file operations
such as importing images and exporting files for localization.
The following diagram shows the Import Export preferences dialog:
For Export directories, you can enable
Auto-Save, which means that this directory will always be
used and the Save dialog will not appear to let you specify
an export directory. You'll just see an information dialog to show you where the
files were written.
From the Window menu, select Preferences....
The Preferences dialog opens.
Select DITA CMS > Import Export.
The Import Export
pane appears.
Click the Browse... button next to the
directory field to configure.
The Browse For Folder dialog appears.
Navigate to the required folder.
You can create a new folder, if applicable.
Click OK.
The path to the selected folder appears in the directory field.
Select Auto-save, if desired.
Click Apply.
Click OK.
The specified directories will be used for future import and export operations.