You can import a new image into the Content Store and insert it at the cursor position in your topic.
-
Lock your topic and place your cursor in the location where
you want to insert the image.
-
Do one of the following:
- Press CTRL+ALT+I.
- On the Document Creation toolbar, click the Create Image
button (
 ).
).
- From the menu bar, select .
The Show/Edit
Image dialog appears.
-
In the Title box, type a
title for the image object.
Titles do not need to be unique.
-
In the Description box,
type a description of the object which can be useful to identify the image in a
search.
This information becomes part of the file metadata. Enter all
the keywords that you think may be useful when you want to search for the
file.
-
In the Image Type list,
select the type of image being imported. The types displayed depend on what is
configured in your deployment.
-
If the image contains text that requires localization, select
Needs Translation.
Note: If Needs Translation is
not selected, then when the map is put into the Localization cycle, the image
will automatically be given the status of Localization:review
(or its equivalent in your
workflow).
-
In the Language list,
click the language used in the image.
-
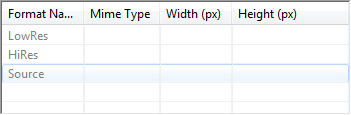
In the Images area,
select a Format name.
Format names represent the different graphic formats or
resolutions that your system uses with different types of output. The format
names displayed vary according to how your system is configured.
Note: A line with no image details (no Mime Type,
Width, Height) means that there is no image in the repository for that format.
-
Click Import.
The Open dialog
appears.
-
Navigate to the required image, select it, and click Open.
Tip: You can
configure a default import directory where the Open dialog will go
automatically by configuring the Import
Export options in Preferences.
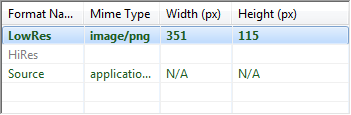
The Show/Edit
Image dialog reappears. The Images area displays the new image's Mime type, Width, and
Height, and the image itself is
previewed at the side.
-
Repeat the import process for the
different formats you need for that image.
Once an image has been imported into the repository for a
specific format name, that line displays in green to indicate that this is a new
image. The default image is displayed in bold.
-
Select the image format that you want to use as the default and
click Set as Default.
This is the image that will appear in the Preview view. It is also the image that will be substituted if the
Output Generator cannot find the format specified by a transformation
template.
-
In the Labels pane,
click Select to add labels.
The labels that you select are listed in the Labels pane.
-
If you want to insert the image into the topic currently open
in the XML editor, select the Insert image at the
cursor position checkbox.
The checkbox is available and selected by default when a
topic is open and locked in the XML editor. If the Insert image at the cursor position checkbox is not selected, the
image object will be created in the Content Store, but not inserted into a
topic.
- Optional:
To save the settings you have selected for Language and Image
Type, click Save Settings.
Your selections are saved and used as the default values in
the Show/Edit Image dialog.
-
The following steps depends on whether the IXIASOFT Dynamic Release Management module is enabled in your
deployment. Do one of the following:
- If you see the Next button at the bottom of the Show/Edit Image dialog, this module is enabled in your
deployment. Click Next to specify
the release management details.
- Otherwise, this module is not enabled. Click OK to create the image. You have completed this
procedure.
-
If the Insert image at the cursor
position checkbox is not selected, you must choose into which
product or library the image is added. When the checkbox is selected, the image
is added to the same product or library as the topic so you can skip this step.
To choose the product or library:
-
In the Add Object
To pane, select Products or Libraries.
-
In the All
Products or All
Libraries pane, select the product or library for which you
would like to display the releases and versions.
Use the filter at the bottom of the pane to filter
the objects in the list by name.
The releases and versions for the product or
library selected are displayed in the Selected Products/Libraries, Releases, and Versions
pane.
-
To exclude products/libraries, releases, and versions
according to the exclusion filters, click Apply global exclusion filter settings.
-
In the Selected
Products/Libraries, Releases, and Versions pane, select the versions
in which the object can be used.
Use the filter at the bottom of the pane to filter the
objects by release name.
The Primary Version
drop-down list is populated with the list of selected
versions.
-
In the Primary Version
list, select the primary version for the object.
The primary version is the version for which the object was
initially created.
- Optional:
To save the settings you have selected in this dialog, click
Save Settings.
Your selections are saved and used as the default values in
the Select Versions dialog.
-
When you are finished, click Create.
All the imported images are
assigned a collective ID and stored in a zip file with the extension .image. When output is generated, the transformation
template will insert the correct format or the default format if there is no image with
the required format.